Open Source Tools To Share Your Localhost Server With Anyone On The Internet
Most web developers develop on localhost using their preferred tools and languages and feature a local server to test what they develop. In some instances, they might need to show a colleague or a customer their progress or even test using online test tools like BrowserStack.

It might not be worth the effort to deploy on a dev server to test a small change that they made or the procedure of deploying is probably time-consuming, or you won't have time to wait for deployment to complete.
Whatever the reason, there may be a very easy way to show your localhost by using services together like localhost.run, serveo.net, ngrok.com, no-ip.com, and more.
Perhaps the most widely recognized are ngrok and no-ip.com; however, you have to register to use them, and as a result, there are simpler ways and alternatives, which are discussed.
Ngrok
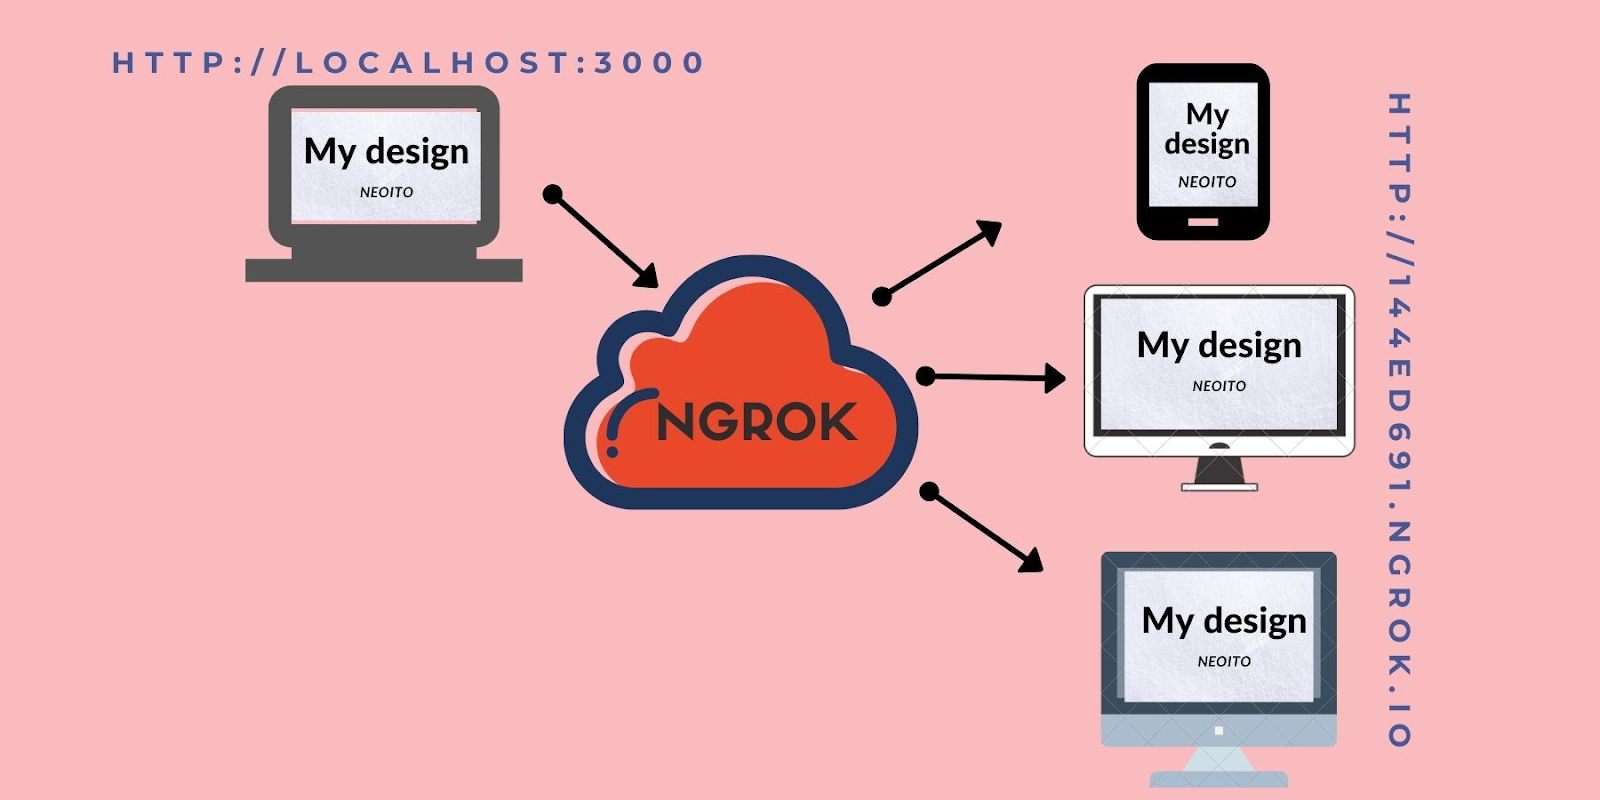
Ngrok is probably the best solution for this. Either that or they pay attention to their SEO strategies. If you google “public localhost”, it comes up. Technically, it isn’t free, but the free tier costs 0 dollars and is sufficient for most development functions.
You’ll be asked to sign up for an account to get an auth token for access to a few useful features. Ngrok has quite good onboarding documentation that covers most of the common questions you have and tasks you may want to complete. There are installers for Windows, Mac, and numerous Linux versions.
For Unix-based systems like Mac/Linux, you can move the binary to the location in your $PATH so you can use the ngrok command anywhere, or add an alias to the binary to get easier access. Windows has a system PATH as well, although it’s a tad more complex to add things to it. Thankfully, complete instructions for this exist on the interwebs.
The auth token is generated for your account automatically, so simply copy the command, adjust it depending on how ngrok is accessed through your command line, and you are all set. Make sure your local web server is running, and pay attention to which port you’re using.
For example, if your application is running on port 3000, then use this command to start an HTTP tunnel:
ngrok HTTP 3000And if you log into your ngrok account, you can see the listing of HTTP tunnels you have online currently.
Another beneficial feature Ngrok provides is a way to check out all requests your public URL has acquired. If you observe the list of information logged for your console when you first run ngrok, you’ll see a URL for Web Interface, by default it is http://127.0.0.1:4040.
You can also replay a selected request. So if triggering a selected request in your software requires a sequence of steps, you could skip all that and simply resend the request on your local server using ngrok.
Ngrok has a lot of features, so it’s a great idea to look through the documentation to see what you can do. Ngrok’s paid features consist of the use of custom or reserved domain names (rather than getting a random string whenever you run it), the reservation of TCP addresses, and IP whitelisting, among others.
Localtunnel
Localtunnel is an open-source project that shares similar functions as the service that has been mentioned earlier. It is essential for your computer to already have node.js installed in order for you to install it using npm using this command:
npm install -g localtunnelAfter that, you will gain access to the lt command, and you will be able to start your HTTP tunnel using the following command:
lt --port 4000
Be sure to change the command to correspond with the port on which your web app is running. You get a publicly accessible URL, and most of the time, that might be enough to set up an integration with a carrier that supports webhooks. You will be supplied with a URL that is open to the general public. What’s interesting about Localtunnel is that there is also a repository you could clone to set up your own localtunnel server, and consequently use your personal custom domain. This method calls for you to manage a server wherein you could set up DNS entries, in addition to taking care of incoming TCP connections for any non-root TCP port.
Cloudflare Tunnel
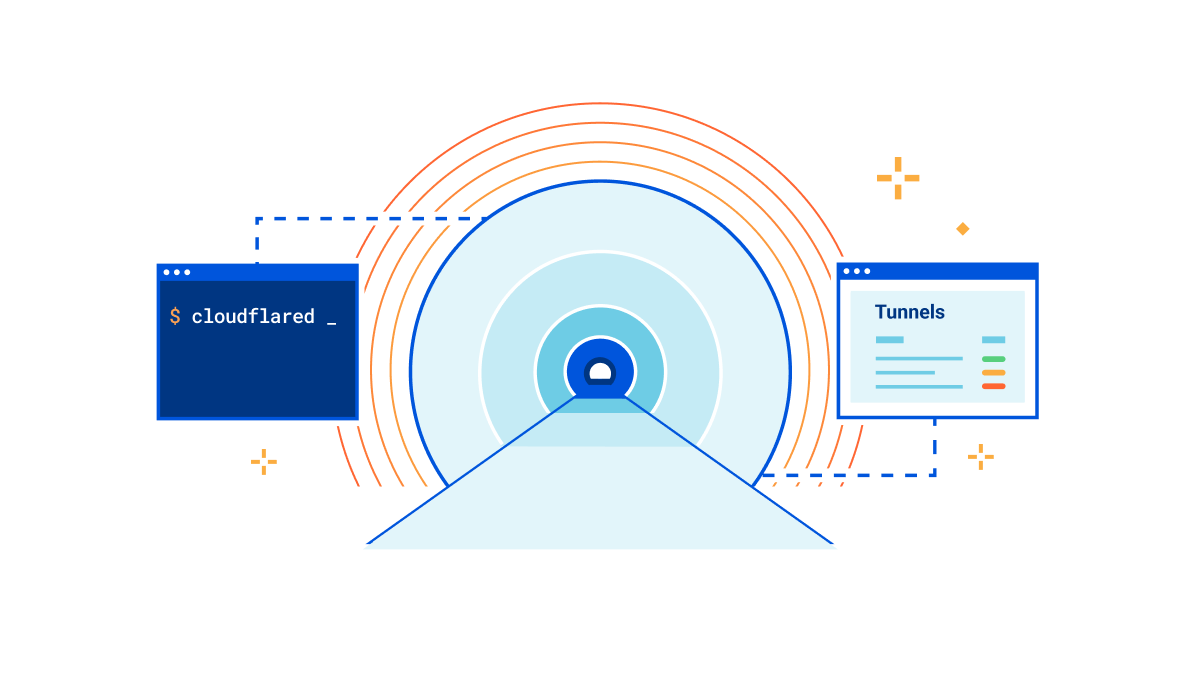
Cloudflare Tunnel is a tunneling provider provided by Cloudflare, a top content delivery network (CDN) and cybersecurity organization. Cloudflare Tunnel lets you create steady connections between your local dev device and Cloudflare's global network of servers.
With Cloudflare Tunnel, you can show any TCP provider running on the local system to the internet. This consists of web servers, databases, and different network services. Cloudflare Tunnel also supports HTTP and HTTPS protocols and can be used to test web applications and APIs.
One of the benefits of the Cloudflare Tunnel is its integration with other Cloudflare services. You can use Cloudflare's firewall and other protection features to protect your applications from malicious traffic. Cloudflare Tunnel also offers real-time logs and analytics to monitor visitors and overall performance. It offers a free plan that provides a confined range of tunnels and connections. Paid plans provide more advanced functions, together with custom domains, SSL certificates, and advanced analytics.
You have to create a Cloudflare Tunnel account and install the Cloudflare CLI. You'll also need a Cloudflare account with a zone. After creating the account and zone, here's the way to create a tunnel to a local web server running on port 3000:
Install Cloudflare CLI
brew install cloudflare/cloudflare/cloudflared
Authenticate cloudflared
cloudflared tunnel loginRunning the above command will:
- Open a browser window and ask you to log in to your Cloudflare account. After logging in to your account, select your hostname.
- Generate an account certificate, the cert.pem document, in the default cloudflared directory.
Create a tunnel
cloudflared tunnel --url http://localhost:3000This command will start the Cloudflare Tunnel and create a public URL that can be used to get access to the local web server. You can verify that the tunnel has been created successfully by running it.
Cloudflare tunnel listCloudflare Tunnel affords real-time logs and analytics that may be seen inside the Cloudflare dashboard.
Pagekite
Pagekite is another device you can use on your PC to show localhost on the web. Just like other tools in this listing, it takes a port number from you along with a subdomain name and creates a public hyperlink. In order to apply it to your PC, you want to ensure that you've got Python2 installed.

There are just two commands that you have to follow to get started with it. Copy the commands that you have to run first, after which paste them in the terminal. In the second command, you should only modify the port number and then hit enter.
curl -O https://pagekite.net/pk/pagekite.py
python2 pagekite.py PORT SubDomain.pagekite.me
You can see the syntax of the main command that you have to execute so that it will work. You just run them, and it will generate a public link for you. You have to specify the parameters of the commands. So before executing the second command, make changes within the port and subdomain as needed.
Closing words
These are the best tools you could use to show localhost to the internet. All those tools are fantastic, and you can select them based totally on your needs. All the equipment runs from a command line, and you also just need to run an easy command. If you have single or multiple local servers, then you could show them all with ease. These are appropriate for backend developers and programmers. They can simply expose any local app and allow customers and other remote teammates to test it. So, if you are looking for some equipment to expose nearby host apps or offerings to the public internet, then just select any tool from here.
How much is a great User Experience worth to you?
Browsee helps you understand your user's behaviour on your site. It's the next best thing to talking to them.

