Finding Web Element Locators Using The Browser Inspector

In our article on ‘Locators used in Selenium for Object Identification’, we saw the different locators that can be used to identify web elements on a web page and the use of findElement() method for the locators. This article, we will be seeing how we get the locator values from the html snippet of your web page. For this, we can use the built in browser inspectors of your browsers or add- ons like Firebug or Firepath for Firefox. But, from Nov’17 Firebug and Firepath tools have been retired. The new version of Firefox does not support these add-ons, but has all the capabilities of these add-ons in its developer tool. Hence we are skipping these add-ons in our article. In this article we would be covering, how to find the locators using web inspector. Steps are almost same in all the browsers. I will be using the Chrome browser here.
The locators used by Selenium can be classified broadly as attribute based locators and structure based locators. The locators like ID, Name, ClassName, TagName, and LinkText are attribute based as it relies on the attributes of elements for locating elements. XPath and CSS are structure based locators which relies on the structure of page to find elements. The attribute based locators can be found by directly inspecting the web element in html code of the page. For XPath and CSS, there is option to copy them using the inspector or you can also write XPath and CSS selector for the element by yourself and verify if it is correct in the Dev tool of the browser. Writing the XPath/CSS expressions are preferred at times because while copying the path using the developer tools if you are getting the absolute path, there are chances that your code might break if the structure of page changes later. Now, let’s see step by step how you can use the inspector in developer tool of your browser to get these locators.
Using Inspector to get locators
First, Navigate to the web page to be tested and launch the developer tool.
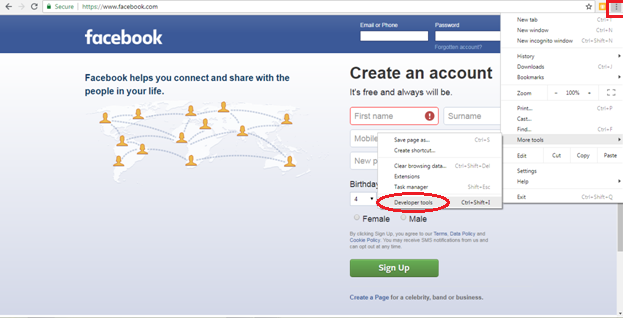
Consider the facebook login page https://www.facebook.com/ and select the Developer tools from Chrome settings or use the shortcut Ctrl+Shift+I
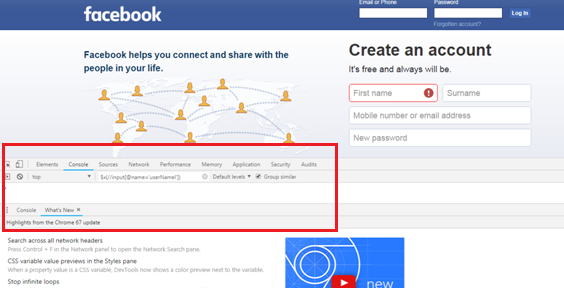
Now, you can see the Dev Tools at the bottom of your page.
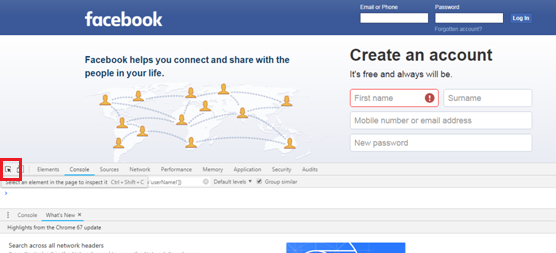
Click the Inspector icon on Dev tools.
Now, if you hover over any web element on the page, it gets highlighted. Keep cursor over the web element you want to inspect and click on it.
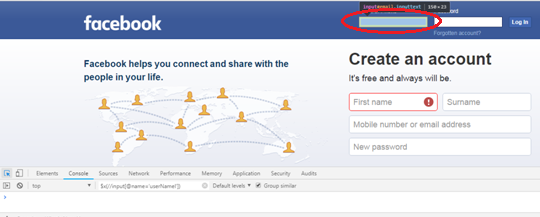
You can see the HTML snippet corresponding to the element you selected is highlighted.
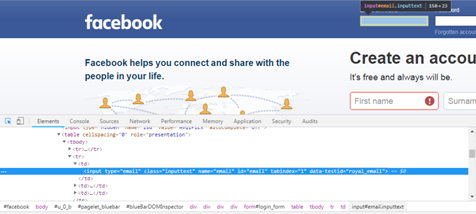
You can get values for all the attribute locators directly from the HTML code line. TagName, ClassName, Name and ID are given in the above example.
<input type="email" class="inputtext" name="email" id="email" tabindex="1" data-testid="royal_email">
Here, TagName is Input, ClassName is inputtext, Name is email, Id is email
So you can write any of the below lines of Selenium code for selecting the Email text box:
driver.findElement(By.id(“email”)) or
driver.findElement(By.name(“email”))
How to get XPath/CSS selector?
To get the XPath/CSS selector, repeat all the steps mentioned above. Right click the highlighted HTML line of code corresponding to the web element and Select ‘Copy-->Copy XPath’ for XPath or ‘Copy-->Copy Selector’ for CSS selector.
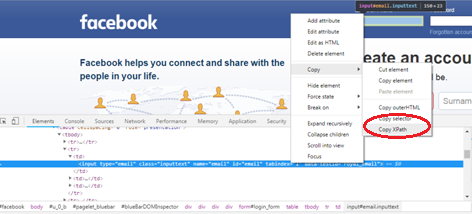
For the above example you get XPath and CSS selectors as:
XPath = //*[@id="email"]
CSS Selector= #email
In the above case, we are getting a relative path itself. Some cases you will get absolute path while copying. In that case you might have to write your own expression for XPath. You can check if the XPath expression is correct and also check if it is pointing to only one web element by giving the XPath expression in the console tab of Dev tool. If you give an XPath, you can see the elements with the XPath highlighted and if the XPath expression is incorrect, it will give you error message in console tab. Let’s now see how this can be done.
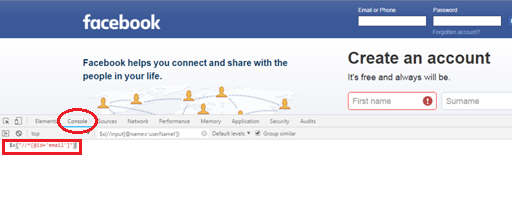
Verifying XPath expressions
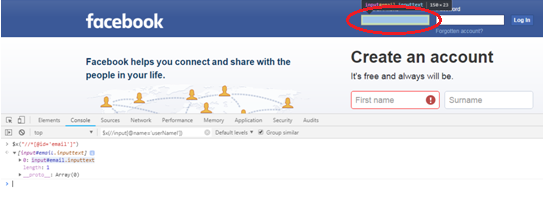
To Verify your XPath, go to the console tab in the Dev tool and type in the XPath following $x enclosing the XPath within ().
For eg: $x(“//*[@id= ‘email’]”)
Note: The attribute value should be within single quotes (eg: ‘email’). Usually in XPath expression it will be within double quotes. Please note this change , otherwise you will get error.
Press enter. Now, you get the elements having the XPath displayed in the console.
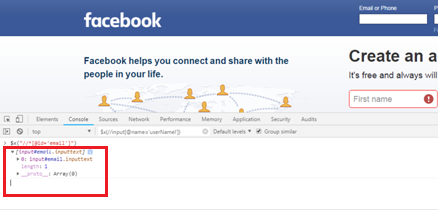
If you select the line, you can see the element also highlighted.
Same way, we can verify CSS expression as well.
How much is a great User Experience worth to you?
Browsee helps you understand your user's behaviour on your site. It's the next best thing to talking to them.

