What is Node file router? Everything You Need to Know.
In Node.js development, it is very important to arrange your project's routes in a good way. This helps keep the code clean and easy to grow bigger. A method that works well is file-based routing, making it simpler to handle routes and improving how you can maintain the code. In this thorough guide, we will explore file-based routing in Node.js very closely. We'll look at its advantages and give you a detailed process for adding it to your projects.
What is Node.js?
Before we go into detail about file-based routing, let's quickly look over what Node.js means. Node.js is a system for running JacemvaScript outside of the browser, on servers. It is recognized for its non-blocking and event-driven structure, which makes it a very good option to create web applications that perform well and can grow..
Why File-Based Routing?
When you set routes by hand, it gets hard to manage when your application becomes bigger. Using a system where files decide the routes has many benefits.
- Each path is in its own file, which supports keeping code modular and easy to maintain.
- Managing the system is simpler because the way we set up routes matches with how files are arranged.
- Scalability: means that if you want your application to grow, just make new files for new routes.
- Readability: Because each route has its own file, the code is more readable.
File-based routing vs. traditional module-based routing

Routing with files and using modules for routing are different methods i.n making web applications that handle paths. We'll take a look at how they differ from one another.
File-based Routing
Pros:
- Enhances code organization, scalability, and maintainability.
- Easier to configure and manage, particularly for large applications.
- Routes can be changed with ease, simply by the addition or deletion of files, as well as through modifications to existing ones.
Cons:
- Offers less control over how routes are mapped compared to traditional module-based routing.
- May become hard to follow when declaring many routes.
Traditional Module-based Routing
Pros:
- Offers more control over how routes are mapped, making it suitable for complex applications.
- Can be more efficient for route definition.
Cons:
- More complex to set up and manage, especially for large applications.
- Paths are set up within modules, which might be less tidy and more difficult to understand than when you arrange them in files.
To summarize, people like file-based routing because it organizes code well, is simple to start with, and adaptable; this is good for small to medium projects. However, module-based routing gives more control and works better for complicated applications even though it might be less tidy and more difficult to handle. Selecting one over the other is based on the particular requirements and intricacy of the task.
This is a tabular comparison between the two:
Let’s dive right into how we can implement file-based routing in Node.js step by step.
1. Installation
Install node-file-router:
npm install node-file-router2. Initialization
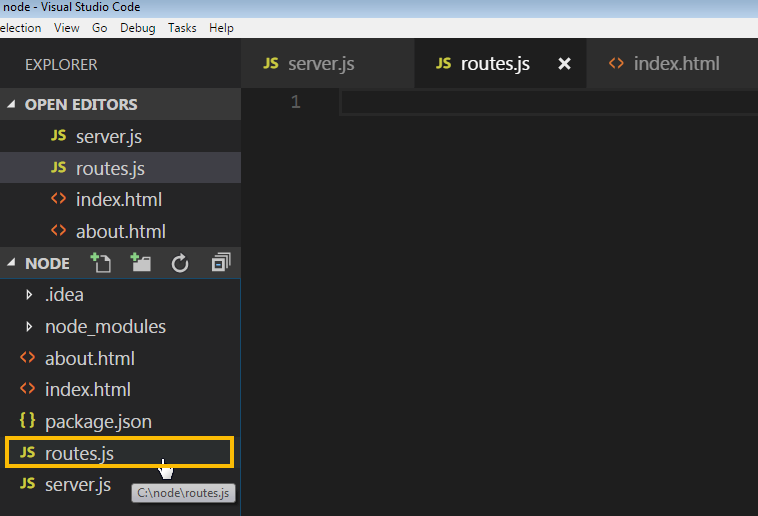
Create a server.js file and do the following:
If you use pure Node.js:
1. Import http module by default and node-file-router;
const http = require('node:http');

const { initFileRouter } = require(’node-file-router’);
2. Create an entry-point function
async function run() {3. Initialize node-file-router and the handler function //
const useFileRouter = await initFileRouter();

const server = http.createServer((req, res) => {
4. Create a server and call created function on each request
useFileRouter(req, res);

});
5. Listen a server on 4000 port.
const port = 4000;

server.listen(port, () =>

console.log(`Server running at http://localhost:${port}/`)

);

}
6. Run the main function
run();If you use Express.js:
const { initFileRouter } = require('node-file-router');

const express = require('express');

async function run() {

  const fileRouter = await initFileRouter();

  const app = express();

  app.listen(4000);

  app.use(fileRouter);

}

run();
3. A first route
We will create a home route that displays welcome content.
1. Make an api folder in your project's root directory.
├── api/ <-

├── server.js

└── package.json
2. Create a file named index.js inside this folder:
├── api/

│  └── index.js <-

├── server.js

└── package.json

module.exports = function index(req, res) {

  res.end("Welcome to our shop! ");

}
3. Run a server using: node server.js command
4. Open an internet browser and navigate to the following link:
http://localhost:4000. You will see a greeting that reads "Welcome to our shop". displayed.
Now, You've created a first file route
4. Add HTTP methods
1. Add a compact utility function
Before beginning, we require a compact utility function capable of parsing JSON from a request. Make a folder called utils and place the file http.utils.js inside.
├── api/

├── ...

├── utils/

│  └── http.utils.js <-

...

module.exports = {

  parseJson(request) {

    return new Promise((resolve, reject) => {

      let data = '';

      request.on('data', (chunk) => {

        data += chunk;

      });

      request.on('end', () => {

        try {

          const parsedData = JSON.parse(data);

          resolve(parsedData);

        } catch (e) {

          reject(e);

        }

      });

    });

  }

}
2. Make a folder called products and include an index.js file within it.
├── api/

│  ├── products/ <-

│  │  └── index.js <-

│  └── ...

...
3. Implement get and post methods:
const { parseJson } = require('../../utils/http.utils');

module.exports = {

  get: (req, res) => {

    res.end('list of products');

  },

  post: async (req, res) => {

    const newProduct = await parseJson(req);

    res.end(`a product will be created: ${JSON.stringify(newProduct)}`);

  }

}
4. Open a browser and go to http://localhost:4000/products.
There should be a message displaying a list of products. Send a POST request by curl, Postman or another tool you prefer to the address http://localhost:4000/products. The response should indicate that a product will be created in conjunction with your content.
5. Dynamic routes
1. Inside the product folder, create a new file called [id].
├── api/

│  ├── products/

│  │  ├── ...

│  │  └── [id].js <-

│  └── index.js

...
2. Fill it the same way as you did before:
module.exports = {

Please place the `routeParams` argument at the end of the function. This will contain

  // all the taken route parameters.

  get: (req, res, routeParams) => {

    const { id } = routeParams;

    res.end(`product ${id} info`);

  }

};
3. Launch your browser and navigate to http://localhost:4000/products/123.
The page should display the following message: product 123. Alright, let's make it more sophisticated. Assume we want to address the following scenario: /catalog/tag-1/tag-2/tag-n
4. Place the [[...categories]].js inside a catalog folder.
├── api/

│ ├── catalog/

│ │ ├── ...

│ │ └── [[...categories]].js <-

│ ├── index.js

...
And add a single get method:
module.exports = {

get: (req, res, routeParams) => {

const { categories } = this.routeParams;

// Similarly, this kind of route also covers the “/catalog” path.

if (!categories) {

return res.end('all products');

}

res.end(`get products that have such tags: ${categories}`);

},

};
5. Open a browser and go to http: //localhost:4000/catalog/men/sneakers/nike.
The page should include a list of categories, such as men, sneakers, and Nike.
Conclusion
Now, after going through this step-by-step guide carefully, you know how to implement file based routing in Node.js . This is the first step in creating a well-structured Nodejs application. By doing it this way, routing will be explained in an easy and modular manner that makes the code easier to read and maintain over time; these benefits make it a really good option when building powerful web apps which can quickly grow.
When working on your project, you should consider contacting a company that develops Node.js development. They can assist you in creating robust and scalable applications using Node.js, so your projects will be successful. Thus, employing file-based routing in your Node.js projects from today onwards and reap the advantages of having an orderly as well organized codebase that follows more systematic ways to be written.
How much is a great User Experience worth to you?
Browsee helps you understand your user's behaviour on your site. It's the next best thing to talking to them.

